

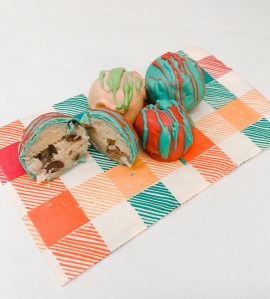
Anyone find themselves loving the cookie dough more than the actual baked cookies? ME TOO! If you said YES, this recipe is definitely for you! These cookie dough bites are so tasty and completely safe to eat as they are egg-free and use heat-treated flour.
Here are the ingredients you’ll need:
- 1/4 cup unsalted butter (1/2 a stick) at room temperature
- 1/2 cup granulated sugar
- 1 tsp vanilla
- 1/4 cup almond milk (regular milk should be fine too)
- 1 & 1/2 cups all purpose flour
- 1/2 cup mini chocolate chips
- 10 ounces chocolate melting wafers (I used white chocolate but use your favorite!)
Directions:
- Preheat oven to 350 degrees F. Before mixing the dough, you will need to heat treat your flour. On a baking sheet lined with parchment paper, evenly spread out your flour & bake for 5-6 minutes. Let flour cool completely before mixing the dough.
- Cream together the butter and sugar with your mixer until smooth.
- Add in vanilla & almond milk and beat until combined.
- Add in cooled flour. Once combined, mix in your chocolate chips.
If your dough looks a little crumbly, take a spatula and mix by hand. It should come together. But as long as it will stay together when you roll into balls, that’s all that matters! If it is still too crumbly, you can add a little more milk.
If you want to keep it basic, roll your dough into evenly sized balls.
Melt your chocolate wafers and color the chocolate if you wish. I melted my chocolate in the microwave using a microwave safe glass bowl in 30 second increments. I used white chocolate wafers because I wanted to add color but you can absolutely use milk or dark chocolate as well. Make sure you get a decent quality chocolate as that will really make a difference in taste.
Dip your cookie dough bites in the chocolate using a spoon. Remove from chocolate & place on a cookie sheet lined with parchment paper to cool/harden. You can drizzle different color chocolate on top of the dipped cookie dough bites if you’d like some decoration.
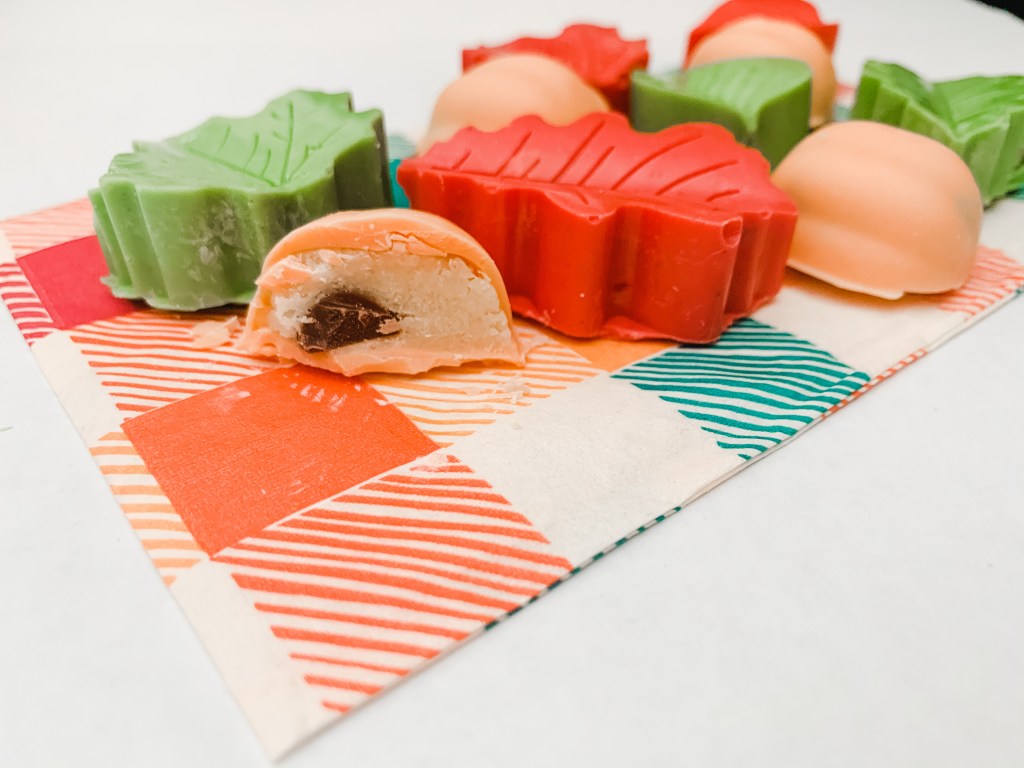
If you want to get fancy and use festive molds, follow these steps instead:
- Pour some chocolate in the bottom of each mold and ensure that the entire bottom and sides of the mold are covered in chocolate. I used a food safe paint brush to help with this but a small spatula will also work depending on the size of your molds. Put the molds in the fridge for 5 minutes or until hardened. Check out the IGTV video for more clarity on this.

- Add however much cookie dough will fit into the mold and press it down.
- Pour chocolate over the top of the cookie dough to complete the mold. If your chocolate has hardened since completing step 1, you’ll need to reheat it before completing this step.
- Let cool. Once completely cooled, carefully pop the chocolate out of the mold.
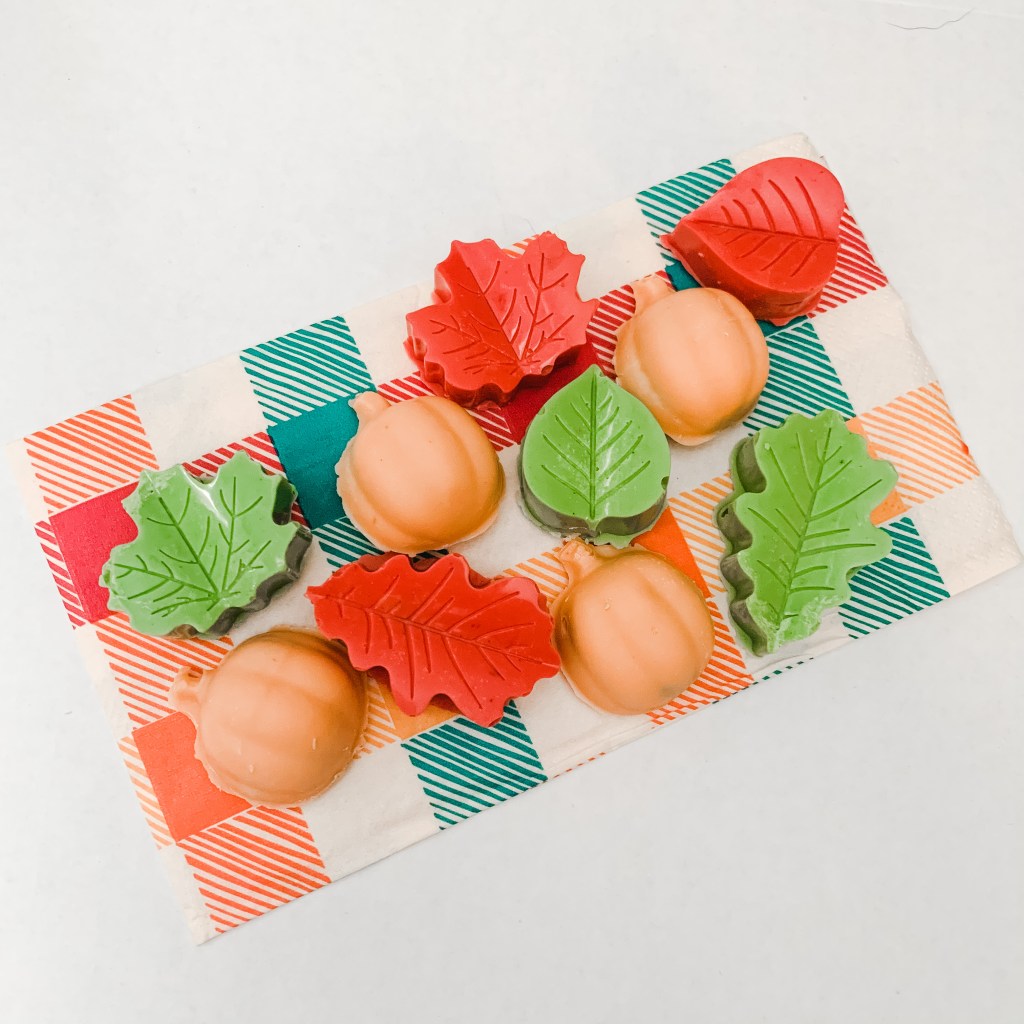
My pumpkin mold is actually an ice cube tray from the Dollar Tree and worked great and the leaves mold is from Michaels!
Check out the process video on my IGTV on Instagram!
