

I made our Save the Dates with my Cricut and absolutely loved how they turned out. But spoiler alert: it was very time consuming and not as financially beneficial as I thought it might be!! I really enjoyed making them so I absolutely don’t regret it but I think there are many factors people should consider/understand before making them. I haven’t made our invites yet because we’ve had to postpone our wedding, twice so far (thanks Covid), but I most likely will when the time comes. This post will really only apply if you’re wanting some sort of invitation pocket fold. If you just plan on a basic invitation, obviously it’s a no brainer to just order them from one of the many online print shops.
Details of my Save the Dates
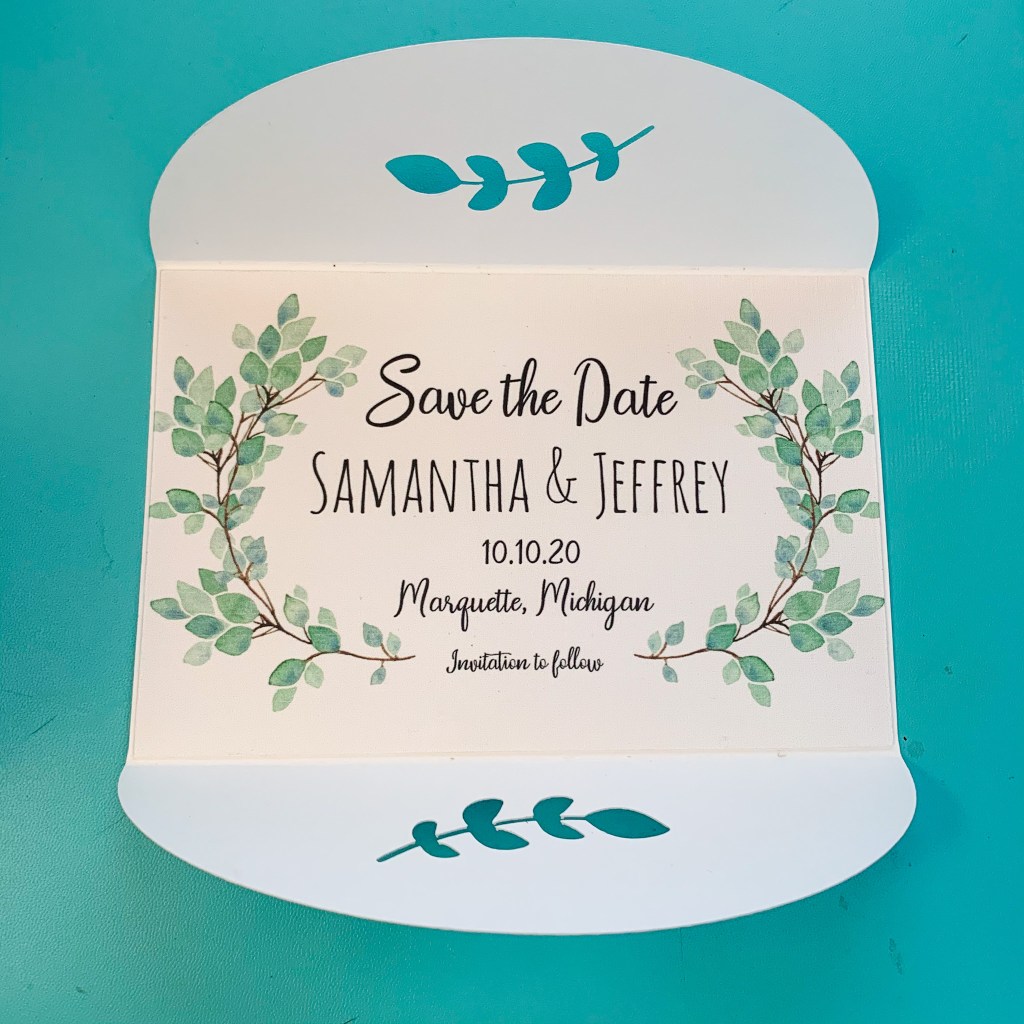
To start, I purchased an invitation design I really liked from Creativemarket.com. The package came with customizable files for the save the date, invitations, rsvp cards, info cards, menu cards, etc. Etsy has a lot of great options too. I then changed some of the fonts to ones I preferred using Adobe Photoshop. Then I designed my gatefold invitation cover in Cricut Design Space with the leaves to match the interior design. Templates for invitation folds/covers can also be purchased but I just decided to make my own. I’ll talk about how I printed the save the dates below. I then cut out the invitation fold using my Cricut. With the size I needed, I could fit 2 folds per mat. So I roughly had to do this about 30 times as we needed approximately 60 save the dates (make sure you have enough supplies to make extra, I messed up a couple of mine along the way). I then attached the invite to the folder and tied each one with a piece of twine.

Printing the Invite vs. Purchasing the Invite
Some people design their invite fully in Cricut Design Space and use Cricut pens to write out all the details. I DO NOT recommend this approach. The writing feature is awesome but this will take FOREVER! I mean if you only need a very small amount of invitations, this might be feasible but I would not recommend for larger weddings.
As mentioned above, I used a purchased template and printed the invite myself at home. My printer was good enough that I was happy with the print quality but it did take up a lot of ink and was fairly time consuming since I could print only 2 per page.
Initially I used the Print then Cut feature in Cricut Design Space to print the save the date and have the Cricut cut them out but after doing several I determined the easiest way was actually to just print the invites outside of Cricut Design Space and then use a paper trimmer to cut them down to their correct size. I then adhered the printed invite to my gatefold invitation cover.
Looking back on my invites, another way you could do this to skip a step would be to print one invitation per page and instead of cutting just the invitation out, you could have the Cricut cut the actual invite and the gatefold from the same piece of paper. This would avoid having to adhere the invitation to the gatefold cover. My gatefold paper and invitation paper were very similar color so this could have been a viable option for me. If you want a different color for the gatefold, obviously this wouldn’t work. I’m not sure if this would actually save much time since it would only be one per page but an alternative to save paper and adhesive.
Time
This wasn’t a huge consideration for me when I decided to make my Save the Dates as I was off work and had nothing but time. It did surprise me how long it took to make 60 Save the Dates though and I think it is something you should really consider before deciding to make them. How much time are you able to commit to making them? Can someone help you assemble them?
If you choose to have the invite professionally printed and then just need to cut out the gate fold or pocket fold and assemble, this would definitely cut down on time a lot.
Cost
I think a lot of people go into this process thinking it will be cheaper than purchasing the invites but I truly don’t think that is the case. Obviously the costs will depend on what type of design you want and how professional you want them to look.
Costs you should consider:
- Cost of invitation design if you’re not creating it yourself
- Printer ink costs if you’re printing the invites (or costs to have them printed professionally)
- Cardstock to print the invites on (this would be 8.5×11 unless your printer can print 12×12 sheets)
- Cardstock to create your “folders” (if you’re not printing the invite & gatefold or pocket fold on the same sheet of paper)
- Adhesive (I used Elmer’s Permanent Tape Runner and went through at least 4 of them).
- Replacement blades if your Cricut blade starts to get too dull
- Any other extras you may add (i.e. foiling, twine, etc.)
Foiling Tip
One of Cricut’s newest releases, the foiling tip, definitely levels up the invites you can make with your Cricut. Before Cricut’s foiling tip was released, you had to purchase a third party attachment to do this which voided your machine’s warranty. Which to me, wasn’t worth it.
The foiling really is a beautiful addition to your invite and really makes it look professional. The tool is also very easy to use with your machine.
If using this, you will need to print the invites using the Print then Cut feature and then the foiling will be done right after that, before the cutting. Otherwise you would never be able to line up the design perfectly.
Addressing Your Envelopes
The one thing I absolutely recommend skipping is addressing your invites with the Cricut pens. It is SO time consuming and really isn’t something that people will even look at. The envelope ends up getting ripped open and thrown out and in my opinion it just isn’t worth the hassle (no matter how pretty it may look). It is very time consuming trying to match up your design to be center on the envelope. I suggest doing a mail merge in a word processor and printing all the addresses on labels.
Items I Used
If you’re curious what paper, envelopes or glue I used, they were from Amazon and I’ve linked them below (affiliate link):
- Elmer’s Tape Runner
- 8.5×11 Paper – Color: White Linen, 100lb
- Envelopes – Color: White, 80lb
- Cricut Explore Air 2
- Foiling Tip (I didn’t use on Save the Dates but will be for our invites!)
So based on the above, my overall message is to make the invites if you love to DIY and the cost/time aren’t an object. Here are some questions I’d ask yourself before you start the process:
- Is your printer good enough quality? Will it print the invite to your standards?
- Can your printer handle the paper weight you want to use?
- How much printer ink will I need/what are the costs?
- Do you want your gatefold/pocket fold a different color than your invites?
- What adhesive do you want to use?
- Do you have enough time set aside to complete them?
- What size invite do you want and how many will fit per page with your paper size? (this will help you judge how long it will take and how much paper you need)
Happy crafting!! And congratulations if you have a wedding coming up!! 🙂 Let me know if you have any questions below or by messaging me on instagram @MakingStuffwithSam
